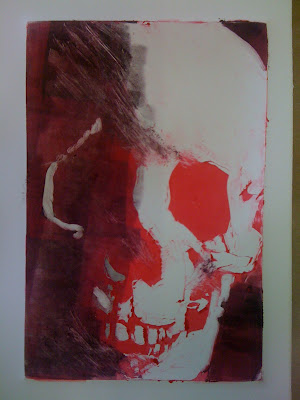
Monotype Printmaking
Wednesday, October 31, 2012
Tuesday, October 30, 2012
Monday, October 29, 2012
LaserJet Transfer
1. You need nitrile gloves (latex or vinyl gloves work too), and empty container, a brush, CitriSolv Concentrate, and a laserjet printout with high color saturation and high contrast and a surface upon which you will transfer the image (typically paper).
2. Put on the gloves and pour a little bit of the CitriSolv into the empty container. You don't need much for this process; just a little bit.
3. Place the laserjet printout face-down against the surface that will accept the transfer. (In this example the surface is a piece of printmaking paper)
4. With just a little bit of CitriSolv on your brush, rub the back of the laserjet print. You will see the image as the paper becomes transparent. The CitriSolv is soaking through the paper and releasing the laserjet toner from the paper.
5. Be sure that the paper does not move or the image will blur. See how I'm holding the paper down with my fingers and thumb as I pull up a corner to show how much toner transfers with this first step.
6. Holding the laserjet paper firmly in place, burnish it with the back of the brush. The high pressure will make more of the toner transfer to the paper on the bottom. You will be able to see the direction you have burnished, so consider the direction you rub.
7. Continue burnishing all around the image. Using the wide side of the brush handle will transfer large areas. Using the thin side will make thin marks, as if you were drawing with a pencil.
8. Notice how much more toner has transferred with burnishing (compared with step 5). You can see the marks made from the brush handle.
9. Here I am using the pointed end of the handle for some thin lines, drawing (rubbing) along contours or textures that will complement the overall image.
10. The paper has to have enough CitriSolv to be damp, but not so much that you see puddles. CitriSolv does evaporate, so you may have to add a little bit more. The amount left in the brush may be enough, so try that first.
11. Keep working until you have as much of the image transferred as you want. Overlapping lines will create a more solid image which is more faithful to the original (and looks more like a real photography), while separations in the lines will make the image look more like a drawing.
12. Here is the final image compared with the ink that is left on the laserjet sheet. This example is very free, and looks like a pencil drawing.
Let's move on to another example that will show how to make a more faithful photographic image...
13. Here, I have a piece of cotton printmaking paper and a normal laserjet printout without any color adjustments.
14. Tape the laserjet print on to the printmaking paper, face down, so it does not move while working.
15. Spread a thin, even coat of CitriSolv on the back of the print and you will begin to see the image. Let the CitriSolv soak through for a minute, giving it time to release more toner from the original laserjet print.
16. Use a medium-hard brayer (roller) to press across the back of the print, making an even initial transfer from laserjet print to printmaking paper. This requires some real pressure. Push hard. Be sure you are not moving the papers or the image will blur.
17. Roll out perpendicular to the previous direction, applying firm, even pressure across the entire image.
18. If it starts to dry up, add a little more CitriSolv. As in the last example, the amount left over in the brush may be enough.
19. Using the back of the brush, burnish important areas in which you want a faithful transfer. High pressure applied by a brayer will make a good transfer, but burnishing creates higher pressure and will ensure better transfer.
20. Using the tip of the brush, trace lines to transfer areas (if you want some pencil-like lines to transfer in the print).
21. Continue working important areas.
22. The places you choose NOT to transfer can become as important as those that you choose to transfer. Consider the entire composition, and how much information you want to transfer in your final print.
23. Remove the tape from one side and peel back the laserjet print. If you need to transfer more, you can put the laserjet print back down (you DID tape one edge to act like a hinge and make sure that the paper will go back down in the same place, didn't you?).
24. This transfer is a little more faithful to the original photo than the first example. You can see the extra character added with the additional burnishing from the back of the brush.
Sunday, October 28, 2012
Saturday, October 27, 2012
Friday, October 26, 2012
Subscribe to:
Comments (Atom)


